Key Takeaways
- Refinishing your cherry wood cabinets enhances the look of your space.
- After staining or painting, sealing is essential to protect the cabinet from moisture or wear.
- A satin or semi-gloss finish is often recommended for kitchens because it’s easier to clean and hides imperfections well.
- Applying your finish with a brush or sprayer will require a steady hand and some practice.
- Regular maintenance not only prolongs the life of your cabinets but also improves your living space.
Dive into Cherry Wood Cabinet Refinishing
Cherry wood cabinets are known for their rich, warm tones and durability. However, over time, even the sturdiest of woods can show signs of wear and tear. Refinishing your cherry wood cabinets can not only enhance the look of your space but also protect the wood for years to come. Whether you’re aiming for a modern touch or a classic look, the right approach can make all the difference.
Expectations and Benefits
Before we get our hands dirty, it’s important to set realistic expectations. Refinishing cabinets is a bit of a marathon, not a sprint. It requires patience and attention to detail. The benefits, however, are well worth the effort. Not only will you save money compared to a full cabinet replacement, but you’ll also have the satisfaction of a job well done. Plus, you’ll be giving your space a personalized touch that reflects your style.
Gathering Your Tools & Materials
First things first, let’s talk about what you’ll need to get the job done right. This isn’t just about slapping on a coat of paint; it’s about creating a finish that lasts and looks professional. You’ll need:
- Chemical stripper (if your cabinet has an old thick layer of varnish or paint)
- Sandpaper in various grits
- Quality wood stain or paint
- A sealant for protection
- Brushes, rollers, or a sprayer for application
- Protective gear like gloves and masks
Selecting the Right Sandpaper
The type of sandpaper you use will make a significant impact on your prep work. Start with a coarser grit to remove the old finish and smooth out imperfections. Then, work your way up to a finer grit for a smooth surface that’s ready for staining or painting.
Choosing Quality Wood Stain or Paint
Cherry wood has a natural beauty that you may want to enhance with a stain. If you’re going for paint, select one that complements the wood’s warm undertones. Quality matters here – the better the product, the more stunning and durable your finish will be.
Sealant Types for Longevity
After staining or painting, you’ll need to seal your cabinets to protect them from moisture and wear.
Choose a sealant that works well with your chosen stain or paint.
- Polyurethane is a popular choice for its durability and comes in a variety of sheens, from matte to high gloss. It’s also easy to apply.
- Water-based finishes are easier to clean up and have less odor
- Oil-based finishes are known for their durability and rich luster.
Dealing with Dust and Debris
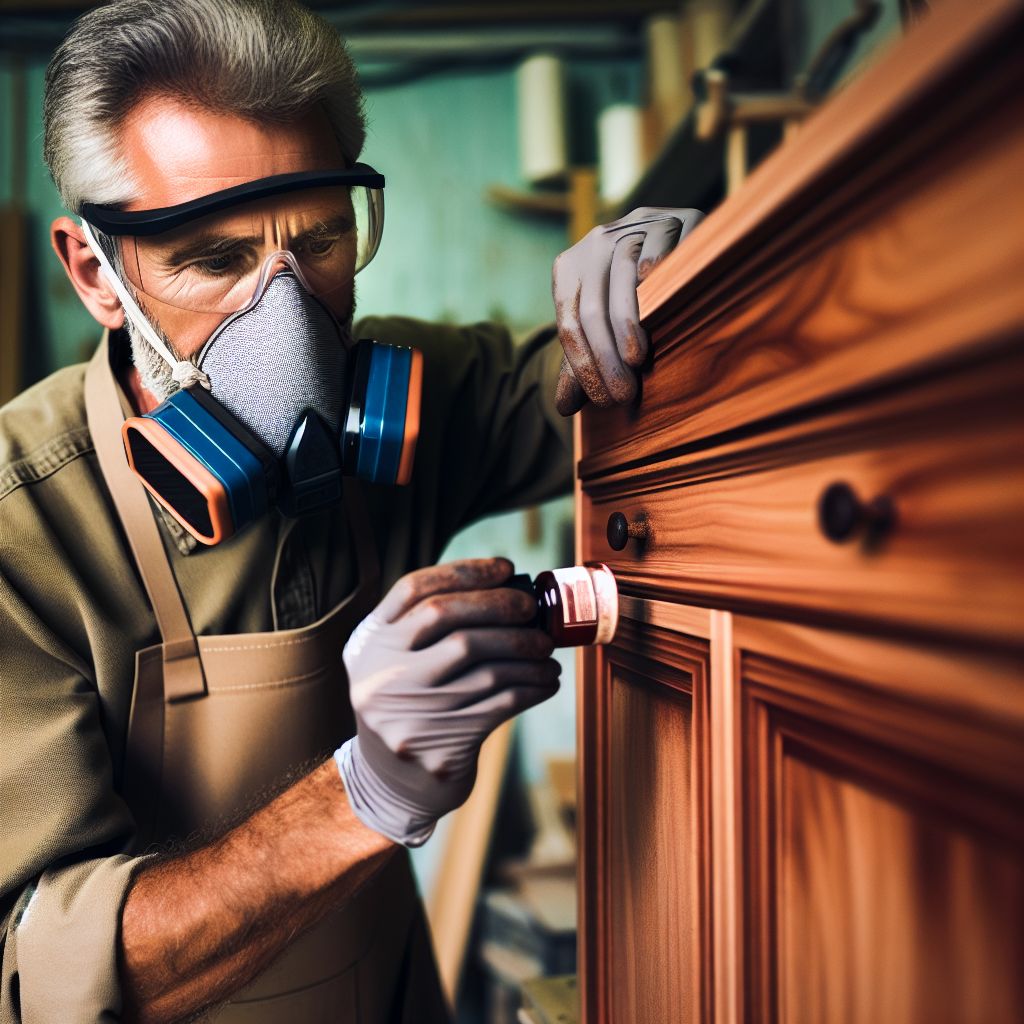
When you’re sanding and stripping your cabinets, dust and debris are inevitable. It’s not just about keeping your workspace clean; it’s about your health too. Always wear a dust mask and safety goggles to protect your lungs and eyes. Keep your work area well-ventilated and clean up as you go. This will not only make the job more pleasant but also prevent any particles from marring your fresh finish later on.
As you sand down your cabinets, you’ll want to use a vacuum with a brush attachment to remove the majority of the dust. Follow up with a tack cloth, which is designed to pick up even the finest particles without leaving any residue behind. Remember, a clean surface is key to a smooth and even finish.

Cherry Wood Cabinet Refinishing: A Step-by-Step Guide Plus Tips
Refinishing cherry wood cabinets can breathe new life into your kitchen or living space, offering a refreshed aesthetic and adding value to your home. Whether you’re a seasoned DIY enthusiast or tackling your first refinishing project, you can achieve beautiful, revitalized cherry wood cabinets.
Step 1: Stripping Away the Old
Now, let’s talk about removing the old finish. If your cabinets have a thick layer of varnish or paint, you’ll likely need to use a chemical stripper to get down to the bare wood. This step is important because the new finish needs a clean and absorbent surface to adhere properly.
Safe Use of Chemical Strippers
- Choose a well-ventilated area to work in, or work outdoors if possible.
- Wear gloves and eye protection to avoid skin and eye irritation.
- Apply the stripper according to the manufacturer’s instructions, using a brush or roller.
- Let the stripper sit for the recommended time, then scrape off the old finish.
- Clean the wood thoroughly with mineral spirits or a recommended cleaner to remove any remaining residue.
Chemical strippers can be messy and hazardous, so it’s essential to follow all safety precautions. Opt for a less toxic stripper if you can, as this will be easier on you and the environment.
After you’ve removed the old finish, give the wood some time to dry completely before moving on to the next step in your DIY refinishing project. This will ensure that any chemicals have evaporated and won’t interfere with your new finish.
Alternatives to Chemicals
If you’re not keen on using chemical strippers, there are alternatives. You can sand the finish off, though this is more labor-intensive and may not be effective for all finishes. Another option is to use a heat gun to soften the old finish and then scrape it off. Whichever method you choose, make sure you’re working safely and effectively to get to that clean, bare wood.
Step 2: Sanding the Wood
Sanding cherry wood cabinets is a key step for refinishing, as it removes imperfections and prepares the surface for new finishes. This essential step enhances the wood’s natural beauty, setting the stage for a stunning transformation. Here’s how to do it:
- Start sanding with coarse grit sandpaper (around 80-100 grit) to remove the existing finish and any imperfections on the surface of the wood. Sand in the direction of the grain to avoid scratches and ensure an even finish.
- Then, switch to finer grit sandpaper (around 120-150 grit) for intermediate sanding. This step smoothens the surface further and prepares it for the final sanding.
- Finally, use a fine grit sandpaper (around 180-220 grit) for the final sanding to achieve a smooth and uniform surface. Sand lightly, focusing on any areas that may still have imperfections or roughness.
- Vacuum or wipe down the cabinets thoroughly to remove all dust and debris generated from sanding. Any remaining dust can affect the quality of the finish, so it’s essential to ensure the surface is clean before proceeding.
Now, your cabinet is ready for the fun part of the makeover!

Step 3: A Fresh Coat: Painting or Staining
Once your cabinets are stripped and sanded, it’s time to decide between painting and staining. This choice will largely depend on the look you’re going for.
Regardless of your choice, make sure to apply a primer if you’re painting, or a pre-stain conditioner if you’re staining. These products help prepare the wood for the finish, ensuring better adhesion and a more uniform appearance.
Stain Selection for Cherry Wood
Choosing the right stain for cherry wood is essential. Cherry is known for its smooth grain and rich color, which can be enhanced with the right shade. You’ll want to test a few stains on a small area or a spare piece of cherry wood to see how it absorbs the color. Look for oil-based stains for deeper penetration and longer-lasting color.
Steps to follow when staining:
- Apply pre-stain conditioner. Allow it to dry completely.
- Apply stain by working in sections and wipe off excess stain with a clean cloth to avoid a blotchy appearance.
- Take your time and apply the stain evenly, following the grain of the wood.
Expert Painting Tips
For those who decide to paint, the key to a professional-looking finish is in the preparation and application.
- Apply primer. Allow it to dry thoroughly.
- After priming, apply thin, even coats of paint.
- Sand lightly between each coat once it’s dry. This will help eliminate brush strokes and create a smooth surface.
Use a high-quality brush or foam roller designed for smooth finishes. If you’re comfortable with a sprayer and have the space to use one safely, this can give you an even smoother finish.
Step 4: Seal the Deal
After painting or staining, it’s time to protect your hard work with a sealant. This is an important step that will protect your cabinets from grease, moisture, and everyday wear and tear.
Applying Sealant Evenly
To apply the sealant evenly, follow these steps:
- Start with a clean, dust-free surface. Use a high-quality brush or sprayer and apply the sealant in thin, even coats.
- Allow adequate drying time between coats, as recommended by the sealant manufacturer.
- Sand lightly with a fine-grit sandpaper between coats to ensure a smooth finish.
Step 5: Reassembly and Replacement
Once your cabinets are dry and cured, it’s time to put everything back together. This is the moment when your project really comes together, and you can see the fruits of your labor.
Reattaching Doors and Hardware
Take your time when reattaching the doors and hardware. If you’ve opted for new hardware, this is the time to drill any new holes and attach them. If you’re using the original hardware, it might be a good idea to clean and possibly refinish them to match your new cabinets.
Make sure all screws are tightened properly but be careful not to over-tighten, as this can strip the holes or damage the wood. Use a manual screwdriver for better control, especially on those final turns.
Aligning for Flawless Function
Alignment is key for a professional look and for the functionality of your cabinets. Use a level to ensure your doors are perfectly horizontal and vertical. Adjust the hinges as necessary to achieve the right fit. Remember, even the smallest misalignment can become noticeable once all the doors are in place.

Maintenance Tips to Preserve Your Handiwork
Now that your cherry wood cabinets look stunning, let’s keep them that way. Regular maintenance not only prolongs their life but also makes your living space more pleasant.
Regular Cleaning Techniques
To clean your cabinets, use a soft cloth and a mixture of mild dish soap and water. Avoid harsh chemicals or abrasive cleaners that can damage the finish. Wipe in the direction of the grain, and dry with a clean cloth to prevent water spots.
Dealing with Wear and Tear
Even with the best care, cabinets will eventually show signs of use. Touch up minor scratches or chips with a matching wood marker or a small amount of stain. For more significant damage, you may need to do a spot refinish. Keep a maintenance kit handy with your leftover stain or paint, brushes, and sealant for quick fixes.

Frequently Asked Questions
Can I refinish cherry wood cabinets without sanding?
While sanding is the best way to prepare cabinets for a new finish, there are products like liquid sandpaper that can de-gloss and prepare the surface for paint or stain without traditional sanding. Just know that these methods may not be as effective at removing imperfections or allowing for deep stain penetration.
How long does the refinishing process take?
Refinishing cabinets is not a weekend project. Depending on the size of your kitchen and the extent of the work, it could take several days to a couple of weeks. You’ll need time for cleaning, sanding, drying between coats of paint or stain, and curing the finish. It’s a labor of love, but the result is worth the wait.
For example, a small kitchen with minimal cabinet doors might only take a few days, while a large kitchen with intricate cabinet designs could take up to two weeks or more.
What is the best finish for cherry wood cabinets?
The best finish for cherry wood cabinets is one that will protect the wood and bring out its natural beauty. A polyurethane finish is a good choice for its durability and range of sheens. Water-based polyurethane is easier to clean up and has less odor, while oil-based polyurethane has a longer-lasting finish.
How do I avoid brush marks when painting cabinets?
To avoid brush marks, use a high-quality brush or foam roller designed for smooth finishes. Apply thin, even coats and sand lightly between each coat once it’s dry. If you’re comfortable with a sprayer, it can provide the smoothest finish.
Can old cherry wood cabinets be made to look modern?
Absolutely! With the right color paint or stain, new hardware, and modern accessories, your old cherry wood cabinets can be transformed into a contemporary masterpiece. It’s all about the details and the finish you choose.


Leave a Reply