Key Takeaways
- Recoating adds a fresh protective layer, revitalizing your hardwood floors without sanding.
- Refinishing involves sanding down the floors to bare wood and starting fresh, perfect for floors with deep damage.
- DIY recoating can be cost-effective and rewarding if you follow the right steps and avoid common pitfalls.
- Professional refinishing is ideal for extensive floor damage, ensuring quality and longevity with expert craftsmanship.
- Regular maintenance after either process is essential to keeping your hardwood floors looking their best.
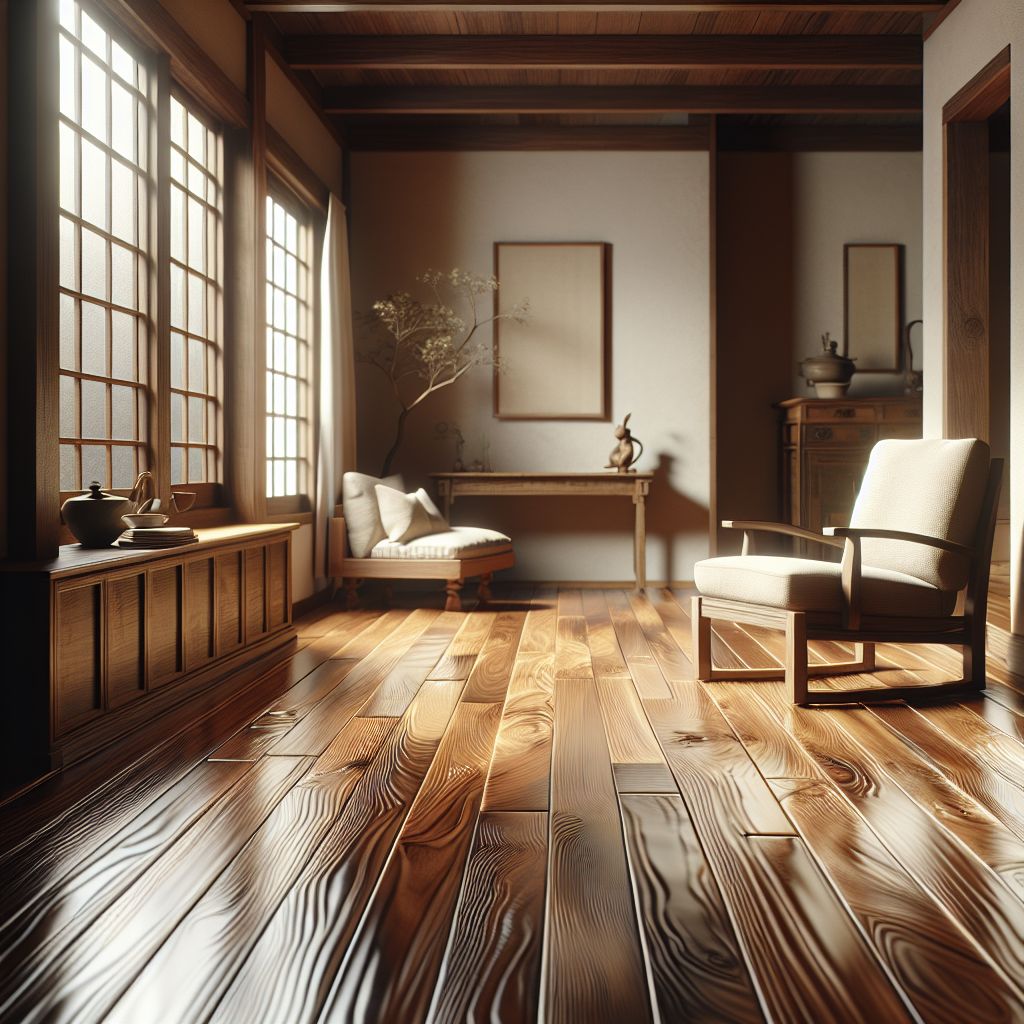
Renewing Your Space: The Hardwood Floor Facelift
Transforming your home starts from the ground up, and there’s no better way to refresh your space than by giving your hardwood floors the attention they deserve. Whether it’s the subtle sheen of a recoat or the dramatic improvement of a full refinish, the right approach can make all the difference. So, let’s dive into the world of hardwood floor care and set the stage for a stunning transformation.
What’s the Difference between Recoating and Refinishing?
Think of recoating like a spa day for your floors—it’s all about rejuvenation. It involves applying a new top coat of finish to your existing hardwood to restore its shine and protect it from wear and tear. This is a fantastic option if your floors are still in good shape but just need a little pick-me-up.
On the flip side, refinishing is like a complete makeover. It’s the process of sanding your floors down to the bare wood, then staining and finishing them all over again. This is the best route if your floors are deeply scratched, discolored, or damaged. It’s a more intensive process, but the results can be nothing short of amazing.
While recoating can often be tackled as a DIY project, refinishing is usually best left to the pros. It requires more specialized equipment and a higher level of skill to get it just right.
To DIY or Not to DIY: That Is the Question
Deciding whether to roll up your sleeves or call in the cavalry depends on a few key factors. Your floors’ condition, your DIY comfort level, and your budget all play a part. If you’re dealing with minor scuffs and a dull finish, a DIY recoat could be a satisfying weekend project. But if your floors have seen better days, with deep scratches or warped planks, you’ll want a professional’s touch.

Understanding the Recoating Process
So, you’ve decided to recoat your hardwood floors yourself. Great choice! It’s a relatively simple process that can be incredibly rewarding. But before you start, let’s make sure you know exactly what you’re getting into.
When to Opt for Recoating
Before you jump into recoating, assess your floors. If they have light scratches and a dull finish but are otherwise in good shape, recoating is your go-to. It’s also a good preventative measure every few years to keep your floors looking their best.
Most importantly, recoating won’t fix deep scratches, dents, or stains that have penetrated the wood. In those cases, you’ll need to consider refinishing.
Step-by-Step Guide to Recoating
Recoating is all about preparation. Here’s a simple guide to ensure you get the best results:
Gathering Materials
- Wood floor cleaner
- Microfiber mop and cloths
- 120-grit sandpaper or a sanding screen
- Water-based or oil-based polyurethane finish
- Applicator pad or brush
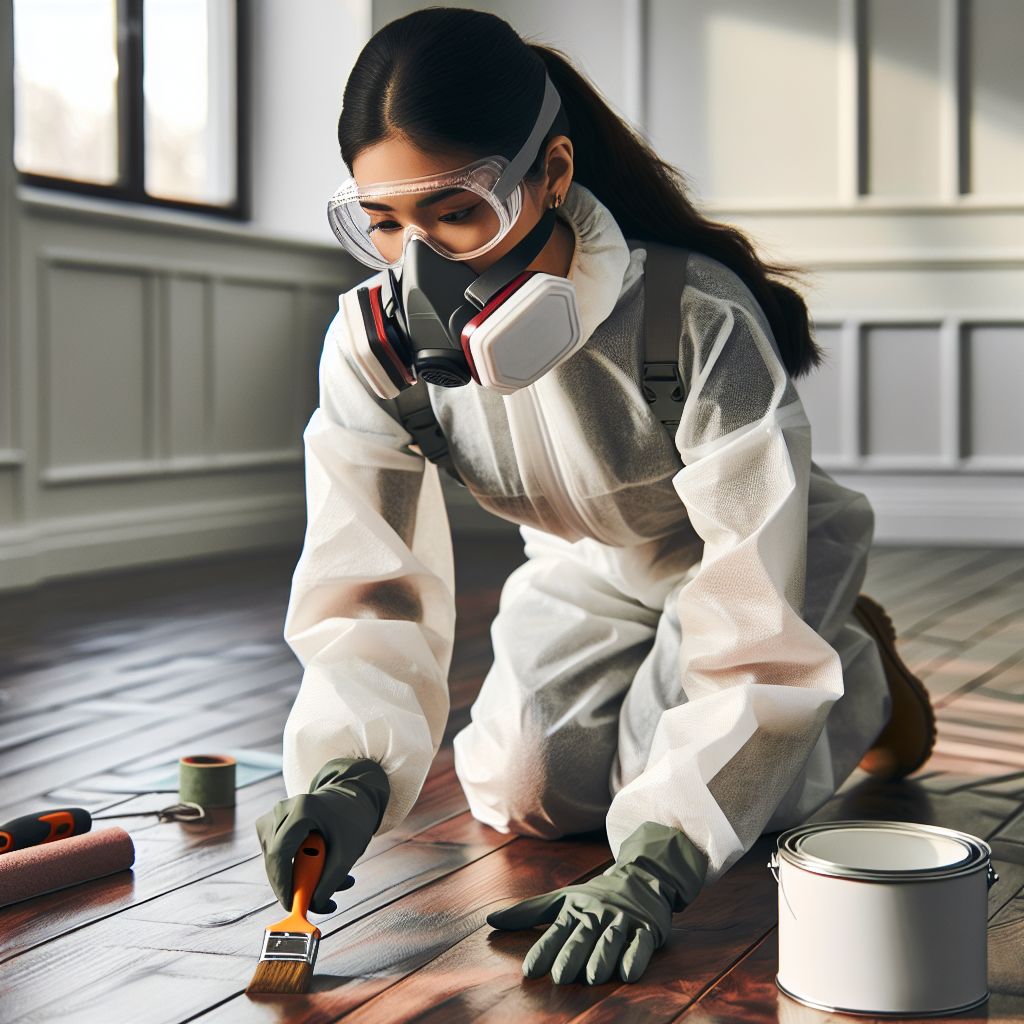
- Protective gear like gloves and a mask
Step 1: Cleaning and Preparing the Floor
Start by giving your floors a thorough cleaning. Remove all the furniture, sweep up any debris, and use a hardwood floor cleaner with a microfiber mop to get rid of any dirt and grime. Your floors need to be spotless before you begin.
Step 2: Sanding the Floor
Next, lightly sand the surface with 120-grit sandpaper or a sanding screen. This roughens up the old finish just enough for the new coat to adhere properly. Be gentle—too much pressure can damage the wood.
Step 3: Post-Sanding Cleanup
After sanding, vacuum up the dust and give the floor another wipe with a damp (not wet) microfiber cloth. Let the floor dry completely before moving on to the next step.
Step 4: Applying the New Finish
Now for the fun part—applying the new finish. Whether you’ve chosen water-based or oil-based polyurethane, the key is to work in smooth, even strokes. Start in the farthest corner of the room and work your way toward the exit. You don’t want to paint yourself into a corner, literally.
Apply a thin, even coat using an applicator pad or brush. Be patient and avoid the temptation to go back over areas you’ve already done. Let the first coat dry as directed, then lightly sand again before applying a second coat. This will give you a super smooth, professional-looking finish.
Refinishing Hardwood Floors to Revive Your Space
Refinishing hardwood floors is an excellent option for repairing damage such as scratches, stains, and dents. This process restores the floor’s original luster, enhances its beauty, and extends its lifespan without the need for complete replacement. It is a cost-effective way to improve aesthetic appeal and increase property value, making it especially beneficial for floors with unique wood grain or historical value.
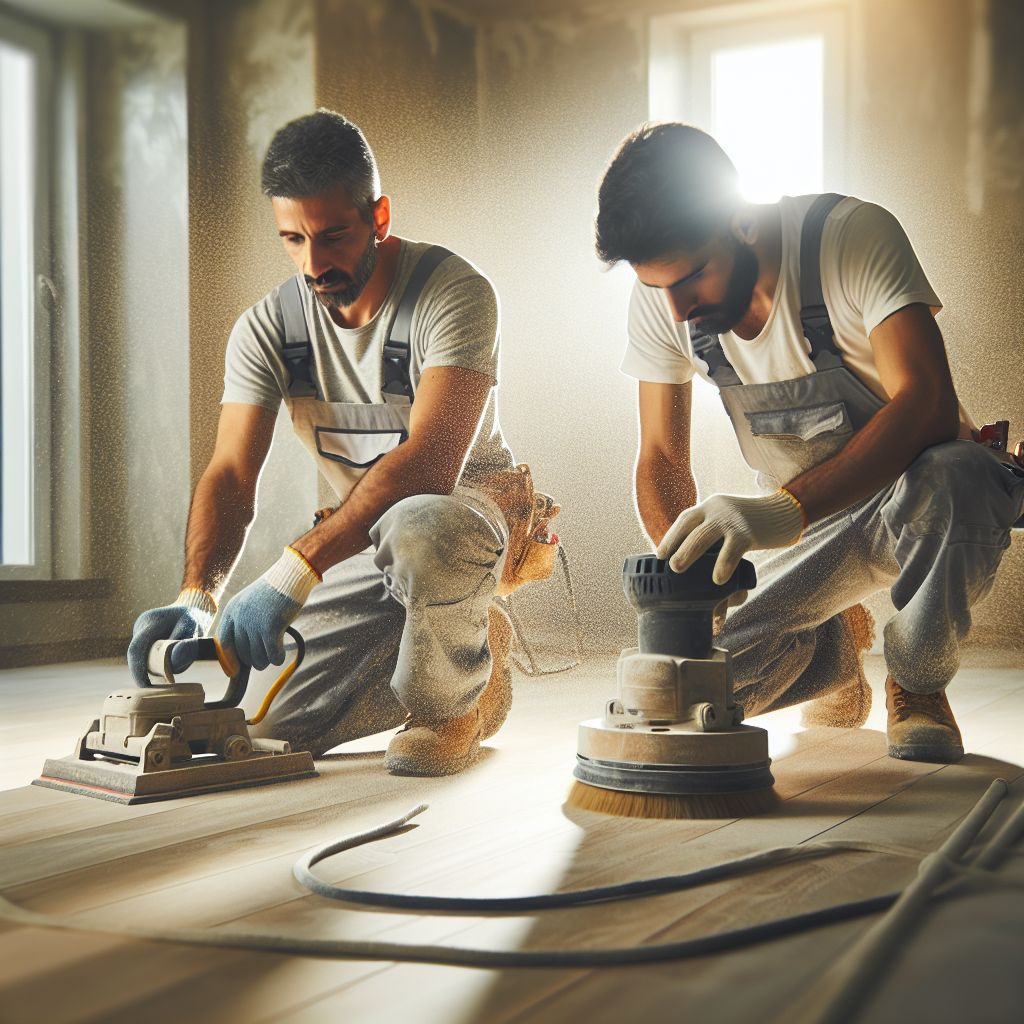
Sanding Tools: From Drum to Detail
When it comes to refinishing, sanding is the heart of the process. You’ll need the right tools to strip away the old finish and smooth out the wood. There are several types of sanders, but the most common are drum sanders, which are great for large, open areas, and orbital sanders, which are better for edges and tight spots. Remember, sanding requires a careful approach to avoid damaging the wood, so if you’re not confident, this might be a sign to seek professional help.
Selecting the Right Stain and Finish
Choosing the right stain and finish is essential to achieving the look you desire. Stains come in a variety of tones, from light naturals to deep, rich darks. Test a small, inconspicuous area first to make sure you’re happy with the color. As for finishes, you have options like polyurethane, which is durable and comes in various sheens, and more natural finishes like tung oil, which can be easier to repair. The key is to match the product to your lifestyle and the level of maintenance you’re willing to commit to.
Professional Refinishing: What to Expect
If you decide to go with a professional for refinishing, expect a thorough and detailed process. Pros will come equipped with industrial-grade sanders, dust containment systems, and years of experience. They’ll handle everything from moving furniture to choosing the right products for your floors. Plus, they can often spot and fix problems you might not have noticed, like areas that need repair or water damage.
DIY Recoating: Tips and Tricks for Success
If you’re set on DIY recoating, let’s make sure you nail it. Preparation is your best friend. Clear the room, clean the floors meticulously, and sand them lightly. Use quality materials and take your time with each step. Don’t rush the drying process between coats, and make sure the room is well-ventilated. With patience and attention to detail, you can achieve a finish that rivals the pros.
Preparation Is Key
A flawless recoat begins with impeccable preparation. Ensure your floors are clean, dry, and free from wax or oil. Tape off baseboards and edges to protect them, and if you’re using a water-based finish, raise the grain with a damp mop before sanding for an even smoother finish.
Mistakes to Avoid
The biggest blunders in DIY recoating come from cutting corners. Rushing through prep work, skimping on materials, or not allowing enough drying time between coats can all lead to subpar results. Another common mistake is failing to remove all the furniture and rugs from the room, which can lead to an uneven finish.
Not Allowing Ample Drying Time
One of the critical steps in recoating is patience. Each coat needs to dry fully before you apply the next one. If you don’t wait long enough, you risk a tacky, uneven surface that won’t hold up over time. Always follow the manufacturer’s recommended drying times, and when in doubt, give it a little longer.
Skipping Steps in the Process
Every step in the recoating process serves a purpose. Skipping any of them, like not cleaning the floors properly before starting or neglecting to sand lightly between coats, can prevent the new coat from adhering correctly. This can lead to peeling, flaking, or a floor that looks dull no matter how many coats you apply.
When to Call in the Pros
There comes a time when a professional’s expertise is invaluable. If your floors are significantly worn, have water damage, or you’re just not getting the results you want with DIY, it’s time to call in the pros. They’ll have the tools, knowledge, and experience to restore your floors to their former glory—or even better.
The Value of Professional Expertise
A professional’s touch can mean the difference between floors that look ‘okay’ and floors that wow. They bring a level of precision and expertise that comes from years of experience. Plus, they can often complete the job faster, with better quality materials, and with less mess than you might make on your own.
How to Choose a Reputable Floor Refinishing Service
When it’s time to hire a professional, do your homework. Look for a service with great reviews, a solid portfolio of completed work, and the proper licenses and insurance. A reputable service will be transparent about their process and happy to answer all your questions.
Asking the Right Questions
When you contact a refinishing service, ask about their process, the products they use, and how they handle unexpected issues like floor repairs. Inquire about the duration of the project and the level of disruption you should expect. A trustworthy service will provide clear, detailed answers.
Cost Comparison: DIY vs Professional
Budget is always a consideration, so let’s break it down. DIY recoating can cost as little as the price of the finish and your time, often under $100. Professional refinishing can range from $3 to $8 per square foot, depending on where you live and the condition of your floors. Remember, while DIY may be cheaper upfront, a professional job can last longer and add more value to your home.
Breaking Down DIY Costs
If you’re considering the DIY route for recoating, you’ll need to budget for materials. Here’s a rough breakdown:
- Wood floor cleaner: $10-$20
- Microfiber mop and cloths: $15-$30
- Sanding screen or 120-grit sandpaper: $10-$20
- Water-based or oil-based polyurethane finish: $50-$100 per gallon
- Applicator pad or brush: $10-$20
That puts you at around $95-$190 for materials, plus your time and effort. Remember, you might need more than one gallon of finish depending on the size of your floors.
The Investment in Professional Services
Professional refinishing, on the other hand, is more of an investment. Prices typically range from $3 to $8 per square foot. For a 200-square-foot room, that’s $600-$1,600. This includes the cost of labor, materials, and the peace of mind that comes with a professional guarantee.
Wrap-Up: Best Steps Forward for Your Hardwood Floors
Whether you choose to recoat or refinish, and whether you go DIY or hire a pro, the most important step is to protect your investment. Properly maintained floors can last for decades, so take the time to care for them correctly.
Maintaining Your Floors Post-Recoating or Refinishing
After recoating or refinishing, use felt pads under furniture legs, trim pet nails, and keep the floors clean and dry. Regular cleaning with a hardwood-specific cleaner and soft mop, immediate spill cleanup, and avoiding harsh chemicals will keep your floors in top condition. Consider also recoating every 3-5 years to refresh the finish and address any minor wear and tear.

Frequently Asked Questions (FAQ)
How often should hardwood floors be recoated?
Hardwood floors should generally be recoated every 3-5 years. However, this can vary based on the level of foot traffic and the type of finish used. If you notice the finish looking dull or worn in high-traffic areas, it’s time for a recoat.
Can I refinish my hardwood floors without sanding?
Traditional refinishing involves sanding, but there are also sandless refinishing options. These typically involve scuffing up the finish and applying a new topcoat. They’re less invasive but might not address deep scratches or damage.
How long does it take for recoated floors to dry?
Drying times can vary based on the type of finish used and the humidity levels in your home. Water-based finishes usually dry faster, within 2-4 hours per coat, while oil-based finishes can take 8-10 hours. Always wait for the finish to fully cure before moving furniture back, which can take up to 72 hours.
- Water-based polyurethane: 2-4 hours per coat
- Oil-based polyurethane: 8-10 hours per coat
- Full cure before heavy use: up to 72 hours
What’s the average cost of professional hardwood floor refinishing?
The average cost for professional hardwood floor refinishing ranges from $3 to $8 per square foot. Factors that can affect the price include the condition of your floors, the type of wood, and regional labor rates.
Are there eco-friendly options for recoating or refinishing hardwood floors?
Yes, there are eco-friendly options for both recoating and refinishing hardwood floors. Water-based finishes with low VOCs (Volatile Organic Compounds) are less toxic and more environmentally friendly. Dustless sanding systems used by professionals can also reduce airborne particles, making the process safer and cleaner.


Leave a Reply