
Key Takeaways
- Assess the veneer’s thickness to avoid sanding through it.
- Proper preparation of your workspace and tools ensures a smoother refinishing process.
- Stripping old finish requires a gentle hand and the right materials to avoid damaging the veneer.
- Sanding should be done in the direction of the wood grain with fine-grit sandpaper.
- Clean the table thoroughly after sanding to remove all dust before moving on to staining.
Revitalize Your Dining Space with a DIY Veneer Table Makeover
Imagine transforming that worn-out veneer dining table into a piece that looks like it’s straight out of a high-end furniture showroom. With a bit of elbow grease and the right approach, you can give your table a second life. Let’s dive into the process of refinishing your veneer table, ensuring that by the end, you’ll have all the knowledge and confidence to tackle this rewarding project.
Understanding Veneer Quality and Tools Needed
First things first, let’s talk about veneer. It’s a thin layer of real wood or engineered material that’s applied to the surface of furniture to give it an attractive appearance. The thickness can vary, so it’s important to handle it with care. You don’t want to sand through to the core material, which is often less visually appealing.
For this project, you’ll need a few essential tools:
- Fine-grit sandpaper or a sanding sponge
- A hand sanding block for even pressure
- Wood stain and sealant
- Soft cloths and tack cloth for cleaning
- Wood glue and clamps, in case of any repairs
Keep in mind that a good quality sanding sponge can conform to the shape of your table, making it easier to achieve an even finish.
Prepping Your Table for a New Lease on Life
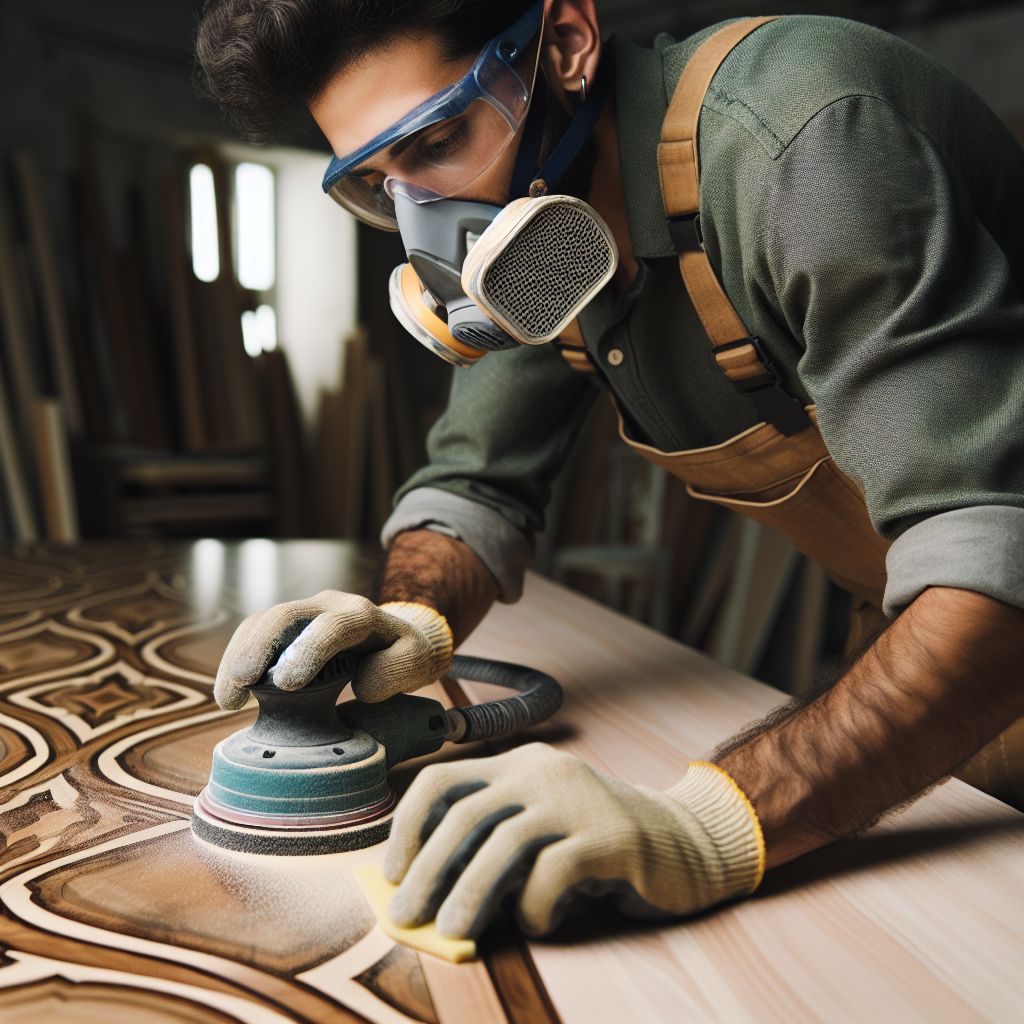
Preparation is the key to success in any DIY project. Start by setting up your workspace in a well-ventilated area to keep dust and fumes at bay. Cover the floor with a drop cloth or old newspapers to catch any spills or debris. And most importantly, wear protective gear like gloves, eyewear, and a dust mask to keep yourself safe.

Veneer Dining Table Refinishing: A Step by Step Guide
Refinishing a veneer dining table can breathe new life into your dining space and rejuvenate the centerpiece of your home. With this guide, you can confidently tackle this rewarding project and transform your veneer dining table into a stylish and functional focal point for your home.
Step 1: Assess and Prepare
Gauging Veneer Thickness and Damage
Before you start, take a close look at your table’s veneer. If you can see the edges, you might be able to gauge its thickness. Older or higher-quality pieces tend to have thicker veneer, which gives you a little more leeway for sanding. But if the veneer is thin, you’ll need to be extra cautious not to sand right through it.
Also, check for damage. Are there any bubbled areas or chips? These might require some additional repair before you refinish. Small imperfections can often be glued and clamped to lie flat again.
Clearing the Workspace and Gathering Materials
With your workspace set up and your protective gear on, gather all your materials and place them within easy reach. This way, you won’t have to stop mid-process to find something you need.
Detaching the Table Components
If possible, remove the table legs and any other detachable parts. This will make it easier to work on the table surface without having to awkwardly maneuver around the entire piece. Keep all screws and hardware in a small container so nothing gets lost.
Step 2: Strip and Sand with Care
Choosing the Right Stripping Method
When it comes to stripping the old finish from your veneer table, you have a couple of options. You can use a chemical stripper, which requires a careful application and a well-ventilated area, or you can sand the finish off manually. If the old finish is thin, a light sanding might be all that’s needed.
Sanding Techniques for Veneer Surfaces
Sanding is a critical step in the refinishing process, but it’s also where things can go wrong if not done correctly. Always sand in the direction of the wood grain, using a fine-grit sandpaper attached to a sanding block. This helps apply even pressure and prevents gouging the veneer. Remember, the goal is to remove the old finish and smooth out the surface, not to sand away the veneer itself.
Managing Dust and Residue
After sanding, you’ll have a fair amount of dust on your hands. Clean up is important; any leftover residue can interfere with the new finish. Use a vacuum with a brush attachment to remove the bulk of the dust, then wipe down the surface with a tack cloth, which is designed to pick up even the finest particles.
Here’s a pro tip: slightly dampen the cloth to make it even more effective at trapping dust.
Step 3: The Art of Veneer Application
Aligning Veneer for a Seamless Fit
If you’re applying new veneer, precise alignment is essential. Start by dry-fitting the veneer sheet on the table surface to ensure it covers the entire area without any gaps. If you’re working with a patterned wood grain, try to match the new veneer’s pattern with any existing wood grain on the table for a seamless look.
When you’re ready to apply the veneer, gently roll it out onto the surface, making sure to avoid any creases or bubbles. If the veneer isn’t self-adhesive, you’ll need to apply an even layer of wood glue to the table surface first, then lay the veneer on top.
For larger surfaces, consider using a veneer roller or a brayer to press the veneer firmly onto the surface and eliminate air pockets. Work from the center outwards to push out any trapped air.
Adhesive Selection and Application
Choosing the right adhesive is essential for a successful veneer application. Wood glue is a common choice, but be sure to select one that’s specifically designed for veneer work. It should have a longer open time, allowing you to reposition the veneer as needed before the glue sets.
Apply the glue with a brush or a roller for an even coat, and be sure not to overdo it – too much glue can seep through the veneer and cause staining or bubbling.
Smoothing Out Bubbles and Imperfections
Once the veneer is in place, inspect the surface for any bubbles or imperfections. If you find any, you can use a pin to prick the bubble and release the trapped air. Then, use a veneer roller or a flat piece of wood to smooth it down. If you encounter a stubborn area, a warm iron over a piece of kraft paper on the veneer can reactivate the glue for better adhesion.
Step 4: Staining and Sealing for Elegance
Choosing a Stain to Enhance Wood Grain
Staining your veneer table can give it a rich, deep color and highlight the natural beauty of the wood grain. Choose a stain that complements the veneer species and the overall style of the room where the table will reside.
For example, if you’re working with a walnut veneer, a medium to dark stain can accentuate the wood’s natural patterns and provide a sophisticated look.
Test the stain on a scrap piece of similar veneer to see how it looks when dry. This will help you avoid any surprises on the final piece.
When you’re ready to stain, apply it with a soft cloth or brush, working in sections and always following the grain. Wipe off any excess stain with a clean cloth to prevent uneven coloring.
Applying Stain Evenly Across Surfaces
Even application is key to a professional-looking finish. If you’re using a brush, use long, even strokes. For larger surfaces, a foam applicator can provide a smooth, consistent coat without leaving brush marks.
After staining, let the table dry completely before applying a sealant. This usually takes at least 24 hours, depending on the stain and the humidity levels in your workspace.
Step 5: Top Coats: Polyurethane vs. Varnish
Once your stain has dried, it’s time to protect it with a top coat. Polyurethane is a popular choice for its durability and ease of application. Varnish, on the other hand, tends to enhance the wood grain but can be a bit trickier to apply without streaks.
Consider the use of your table – if it’s a heavily used dining table, polyurethane might be the way to go for its resistance to heat and spills.
Step 6: Buffing and Polishing for a Professional Shine
After the sealant has cured, it’s time to bring out the table’s shine. A good buffing with a soft, lint-free cloth can work wonders. If you’re after a high-gloss finish, consider using a buffing compound or polish designed for wood. Apply it in a circular motion, then buff with the grain for a sleek, mirror-like finish. This extra step will make your table stand out, reflecting your dedication to the craft.

Maintaining Your Refinished Table
Maintenance is essential to ensure your table’s new finish lasts for years to come. It’s not just about keeping it clean; it’s about protecting the new surface from everyday wear and tear. Let’s walk through some key maintenance tips to keep your table looking its best.
Regular Cleaning and Care
For daily cleaning, a soft, dry cloth is best. Avoid harsh chemicals or abrasive cleaners, which can damage the finish. If you need a little more cleaning power, a damp cloth with mild soap will do the trick. Just be sure to dry the surface immediately afterward to prevent water damage.
Every few months, it’s a good idea to polish your table with a quality furniture wax or polish. This will nourish the wood and add an extra layer of protection against scratches and stains. Apply the wax in a thin layer, let it sit for the recommended time, then buff it to a soft sheen.
Remember, the key to maintaining your table is consistency. Regular care will keep it looking beautiful and help you avoid the need for another refinishing job anytime soon.
Protecting the Surface from Heat and Moisture
Heat and moisture are the enemies of any wood finish. Always use coasters under hot dishes and drinks to prevent heat rings. If you’re serving a hot dish, use a trivet or a thick cloth to protect the table.
For moisture, wipe up spills immediately. Even with a good sealant, prolonged exposure to water can cause damage. If you live in a humid climate, consider using a dehumidifier in the room where the table is located to keep the moisture levels in check.
Touch-Ups: Handling Scratches and Dings Over Time
No matter how careful you are, life happens, and your table may get scratched or dinged. For minor scratches, a touch-up marker or crayon that matches the stain color can work wonders. Just fill in the scratch and buff it out.
For deeper dings, you might need to use a little wood filler and then re-stain the area. Always test the stain on a hidden part of the table first to ensure a good match.

Frequently Asked Questions
Can you refinish veneer without stripping the original finish?
Yes, it’s possible to refinish veneer without stripping the original finish if it’s still in good condition. You can lightly sand the surface to roughen it up, then apply a new topcoat. However, if the original finish is damaged or peeling, stripping it down will give you the best results.
Remember, always test your method on a small, inconspicuous area first to see how the veneer reacts.
How do you repair lifted or bubbled veneer?
Lifted or bubbled veneer can often be repaired by reactivating the old adhesive. You can do this by placing a cloth over the affected area and then applying a warm iron to it. The heat will soften the glue, allowing you to press the veneer back into place. If the glue doesn’t reactivate, you may need to inject some wood glue under the veneer and clamp it down until it dries.
For larger areas, you might need to remove the section of veneer and apply a new piece, following the same steps as you would for applying new veneer.
Is it possible to stain veneer the same way as solid wood?
Yes, it is possible to stain veneer similarly to solid wood, though it is essential to select a stain that is compatible with the specific type of veneer you are working with. Always begin by testing the stain on a scrap piece or an inconspicuous area of the veneer to ensure the finish looks as expected. When applying the stain, do so in thin layers, gradually building up to the desired color intensity. This allows for greater control over the shading and ensures a more uniform application, helping to mimic the look of solid wood.
Keep in mind that veneer can sometimes absorb stain differently than solid wood, so it’s important to be cautious and patient during the staining process.
What kind of sandpaper is best for sanding veneer?
For sanding veneer, fine-grit sandpaper is best. Start with a 220-grit sandpaper for initial sanding and move up to a 320-grit or higher for finishing touches. Always sand in the direction of the grain to avoid scratches and use a sanding block for even pressure.
How long should you wait between applying stain and sealant?
After staining, you should wait until the stain is completely dry before applying a sealant. This typically takes at least 24 hours, but it can vary based on the type of stain used and the humidity in your workspace. Always check the manufacturer’s recommendations for the specific products you’re using.


Leave a Reply